RECIPE! The AMAZING Disney World Main Street Bakery Cinnamon Rolls (With Step by Step Pics AND SECRET TIPS!)
It’s officially the holidays! That means time with friends, family, and (our fav!) FOOD!
And one recipe we constantly get requests for more info on from you, our dear readers, is the long lost Main Street Bakery Cinnamon Roll (it was SO GOOD!). Well, we’re going to show you how to bake like a BOSS this holiday and whip these up for your family on Christmas morning! We PROMISE…it’s not that hard! (Seriously!!)
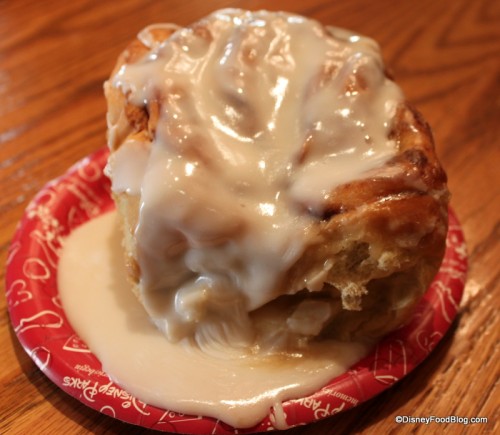
For those unfamiliar, before Starbucks took over the Main Street Bakery in the Magic Kingdom in 2013, one of the star attractions was the warm, gooey, sweet, practically-perfect cinnamon roll the size of your head served there! We loved it so much we practically wrote love sonnets about it. It was THAT GOOD. And while a great version of it can still be found at Gaston’s Tavern, it was just never quite the same for us.
Read more about the OG Main Street Cinnamon Roll vs Gaston’s version HERE!
We’ve shared the recipe for the original Main Street Bakery Cinnamon Roll but what if you’re NOT Betty Crocker in the kitchen? We got yo’ backs! We just so happen to know our way around a kitchen pretty well and we’re going to walk you step by step through making these beauties and even share some BOMB tips to make your foray into baking a surefire hit. Brace yourself for the adoring compliments from your family when they’re wowed by your sweet skillz and let’s get baking!
TIP: if you’re looking to have this for breakfast in the morning, you’re going to want to do the first steps the DAY BEFORE. Yup, you can do the hard work the day or night before then wake up, pull these out the fridge to bake and look like you just effortlessly dominated breakfast.
Ain’t nobody got time to be waking up at the crack of dawn to proof cinnamon rolls. Sleep is our friend.
Cinnamon Rolls Recipe:
Walt Disney World’s Main Street Bakery
Yield: 8 or so MEGA Disney World sized rolls
Ingredients:
Cinnamon Rolls
1/2 cup warm water
2 packages yeast
2 tablespoons sugar
1 (3 1/2 ounce) package instant vanilla pudding
2 cups milk
1/2 cup unsalted butter, melted
2 large eggs, beaten
1 teaspoon salt
8 cups all-purpose flour
1 cup unsalted butter, melted
2 cups brown sugar
2 tablespoons cinnamon
Cream Cheese Frosting
1 8-ounce package cream cheese, softened (room temperature)
1/2 cup unsalted butter, softened
1 teaspoon pure vanilla extract
3 cups powdered sugar
2 tablespoons milk
Process:
First up, let’s gather all our ingredients…
First, in a small bowl mix your warm water, sugar, and yeast. (We only had rapid-rise/bread machine yeast, which works the same here with one tiny exception we’ll share later)
In a big bowl or a stand mixer, make the pudding according to the instructions of the box (2 cups cold milk and the pudding mix. Mix til it thickens up.) We used French Vanilla pudding because pro tip: French Vanilla in pudding=more vanilla-y flavor! Regular vanilla works just fine too. 
In goes the melted unsalted butter (YES unsalted. It matters. Use the right butter, guys.)…
…2 beaten eggs and salt. Whip that all up til well mixed.
It’s gonna look a little thick and lumpyish now. That’s ok!
Now, dump in your oh-so-appetizing yeast mixture and give it a good mix.
Now you’re going to want to add all 8 cups of flour into the wet stuff gradually. This is easiest in a stand mixer but if you’re doing it by hand, we recommend a sturdy spoon to stir. With our mixer we started with the paddle attachment. We’re going to add the flour in 4 batches, mixing well each time. Round 1…
Not too bad. Little lumpy. Round 2…
Ok, getting a little thick here. Round 3.
At this point do as we say, not as we do — if using a mixer, switch to your dough hook. If you’re rockin’ and rollin’ by hand, you’re good to keep going. Get the rest of the flour in there.
We gave in and switched to our dough hook. Note, this makes a LOT of dough, so even in a mixer, it’s a lot for it to handle. Ours kept creeping up over the top of the dough hook. Baking is messy guys…but worth it!
Your dough is going to be a hot mess right now. Shaggy and lumpy. Hang in there! If using a mixer keep going! It’ll get silkier as it mixes. If using a spoon, go ahead and dump your dough onto a floured surface and start kneading it with your hands til it gets smoother (it’ll take 5 or so minutes).
At this point, using a mixer or your hands, you’re going to want to knead the dough by hand the last step of the way. Flour is your friend here, but don’t go crazy.
If you’re new to kneading, just get the hardest part of the palm of your hand and smush into the dough pushing away from you. Fold it over itself and repeat til it feels nice and soft.
When it’s ready it will look roughly like this.
Now, grab a bowl and oil it up (cooking spray or olive oil are all great choices). Plop your dough it and cover it with plastic wrap. This baby is ready to rise!
Now here’s where your yeast matters — if using regular, active dry yeast, you want to let this rest in a barely warm spot (if your oven has a Proof setting, that will be your new BFF) until the dough doubles in size (roughly. Ain’t gonna be perfect here!). The dough will rise, you’ll deflate it by punching it down with your hands, then let it rise again. You’re letting the yeast do its thing and get the dough all puffy. If you cheated like we did and used Rapid Rise/bread machine yeast, you skip this first rise and just do one rise (so no rise, punch it down, rise again. Just rise and done. We’re all bout them shortcuts. Also — it was late and we didn’t want to go to the grocery store.  )
)
While you’ve got some time to kill, let’s make the cinnamon filling…
TIP: The original recipe says to melt butter, brush it on the dough the sprinkle cinnamon and sugar on top. MESS CITY. We’re talkin’ sloppy rolls. You want to bake these like a pro, mix the filling into a paste.
First dump your brown sugar, cinnamon, and room temperature butter in a bowl (if you forgot to get your butter room temp…it happens…pop it in the microwave for NO MORE than 10 seconds).
Give it a good stir. It’ll be thick, but that’s ok.
Set this aside til you need it. Back to our dough…
It’s hard to see from the pictures, but after a couple of hours (it took about 2 for us) that dough is about doubled. Regular yeast users, smash the dough down, re-cover it and wait again. It’ll rise faster the second time. Yeast cheaters like us move on to the next step — rolling out the dough.
Flour your surface and grab your rolling pin. Roll the dough roughly into a 34×21 inch rectangle. This doesn’t have to be perfect, you can eyeball it.
Grab your filling mix and plop it around the rectangle as evenly as you can.
Grab a spatula or knife (or your hands) and spread the mix as best you can. It’ll work its magic while it bakes so it doesn’t have to be perfect.
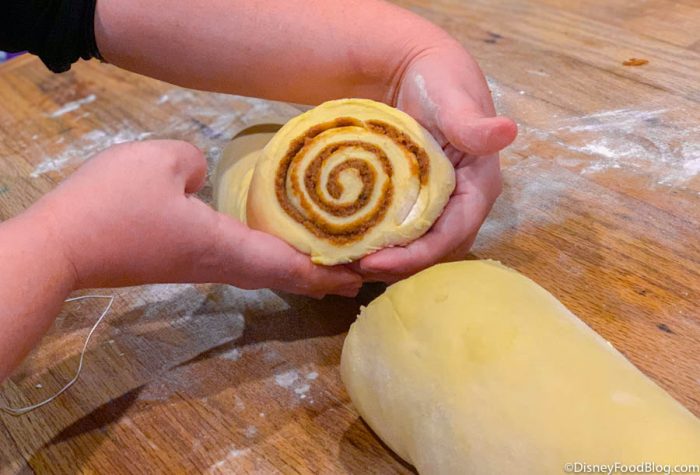
Now we roll! Grab a short side and roll this baby up!
TIP: You weren’t going to cut these with a knife were you? Go to your bathroom and grab that floss you pretend you use instead!  Trust us…
Slip the floss under the roll and cross the ends over the top and pull. Voila! Perfectly sliced, no smushed rolls here!
Look how pretty!
Keep going til the roll is all sliced. You’ll want to space out the cuts about every 2 inches.
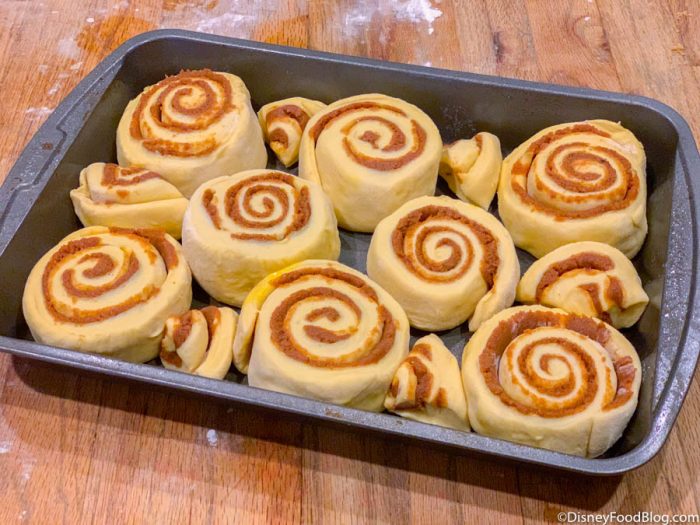
Spray a 9×13 inch baking pan (metal, ceramic, glass…it all works fine here!) with cooking spray or rub down with oil. Place your rolls evenly around. (We had 2 that didn’t fit, so we cut them in quarters. Nothing wrong with that! Smaller nibbles!  )
)
At this point, you’re done for the night! Cover the rolls with plastic wrap and pop the tray in the fridge. Get some sleep! If you’re looking to keep going, just skip the trip to the fridge.
TIP: Grab a stick of unsalted butter and leave it out on your counter overnight for the frosting. You want perfect frosting, don’t you?
If you let them hang out in the fridge overnight, don’t be shocked when you wake up if they’ve puffed a little since you last saw them — that’s normal.
It’s time to let your rolls warm up and rise before you bake them! If you have that Proof setting on your oven, use it! If not, leave these out room temp to warm up. We popped ours in our oven on Proof and about an hour later were met with puffed, ready to bake rolls. They should all be touching.
Preheat your oven to 350 degrees. When hot, pop the rolls in! Depending on your oven, they can take anywhere from 15-30 mins. Ours were perfect at 25 minutes.
YUM. But what’s missing? Oh…yea: FROSTING!
Since you left your butter out like we told you to (you did, didn’t you?!) dump the stick of unsalted butter, a package of cream cheese, and 3 cups of powdered sugar, and vanilla extract in your mixer or a bowl.
Whip this up with your mixer or by hand with a spoon or whisk.
DON’T EAT IT YET. Stop! Put the spoon down!
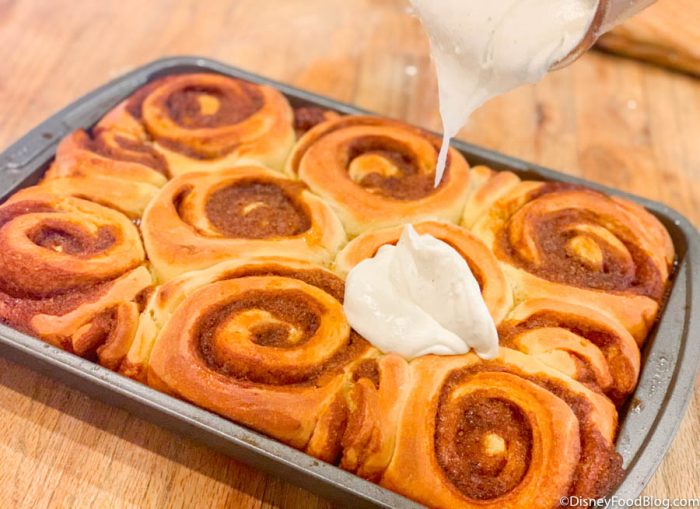
Only thing left to do: frost the warm cinnamon rolls!
Use. It. All.
Perfect.
Now, show your family what a pro-pastry chef you are and enjoy the adoration. You. Are. The. BOMB!
The result? SO moist and deliciously fluffy. The frosting is just cream-cheesy enough and oozes down evverrrywhere in the rolls!
Close your eyes, take a bite and pretend you’re on Main Street, U.S.A. WORTH IT!
Yeasted rolls can be SCARY for newer bakers but we promise, follow the steps above and you’ll be shocked when you have a HUGE plate of perfect cinnamon rolls in front of you in no time. Ok, not “no time”…they do take a bit of work, but so worth it and your family will love them (if you share!).
Have you made the Main Street Bakery Cinnamon Rolls before? What did you think? Let us know in the comments!
from the disney food blog https://ift.tt/2LFBlQ4


Post a Comment